You know you're all grown up when your family is expecting a bundle of joy. The days of worrying about finding jobs, finishing school, finding our selves and growing up has finally hit a plateau. Everyone is growing up so fast.
My cousin's baby shower is this Sunday and I have been thinking about what I want to
do...
give... make. Being in a rough place right now (financially), it was either buy a cute baby outfit or make something. The last two baby showers, I had a tough time finding a gift. Although they were we'll received, anything you give for the baby is always well received, I just wished it was something more special. This time I'm going with my crafty side, spend a little time making something for soon-to-be Baby Natalie.
And... this was the end result
A nursery mobile made of felt in a whimsical cloud shape with heart shaped rain drops. I know that the nursery theme is going to be Disney Princesses, so it was obviously going to be sweet pinks.
All you need is:
felt
cotton floss and needle
ribbon
O-ring
poly-fill (for stuffing)
scissor
paper and pencil
pins
Create a template. With a big enough sheet of paper and pencil, draw the desired cloud shape and cut out a pattern.
Trace the shape onto the felt.
Fold over or layer another sheet, for a total of 2 layers of felts. You'll need 2 layers if you want to stuff the cloud.
Use pins to keep the 2 pieces of felt together so that it does not move or shift during cutting and stitching. Pin all the way around the cloud.
You should have 2 layers of felt pinned together and cut out.
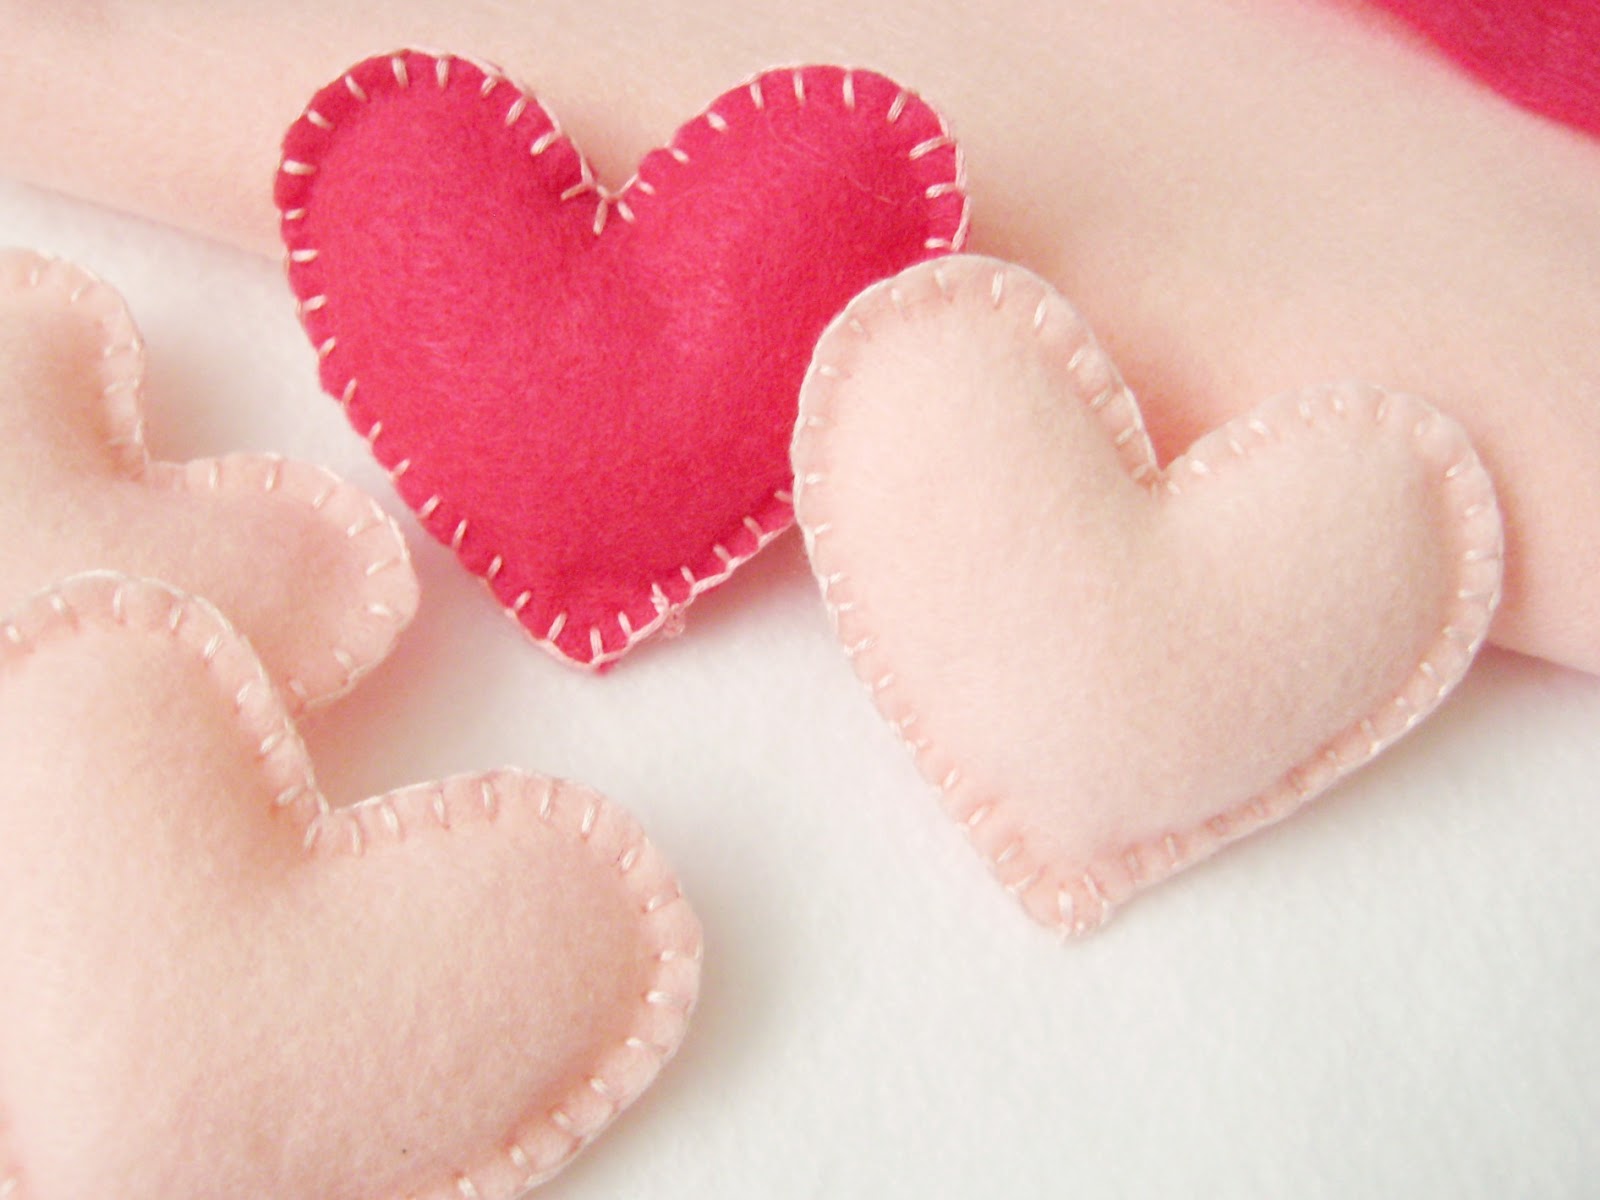
Do the same for the hearts (2 layers each heart).
Make it extra special. You only need one layer for the name since the name will be stitch onto the cloud, not needing the extra stuffing. Pin the letters down in place to position the letters first, then begin stitching the letters to the (top) layer of the cloud.
Once the letters are stitched down, stitch the two cloud shapes together, leaving 2-3 inch opening for the stuffing. Fill the cloud with stuffing, then continue stitching to enclose.
I used a straight stitch technique for the letters and the cloud. I used a blanket stitch technique for the hearts. You can also do a straight stitch on the hearts, it's your preference.
If you do not have cotton floss, you can always use sewing tread, string, yarn or anything on hand.
Unfamiliar with the
blanket stitch? Not to worry, it looks complex and confusing, but it's rather easy and simple to follow.
- Start from the back, and insert needle towards you
- Insert needle to the left going through to the back, without pulling to tight, leaving a small loop created by the second insert.
- Pull the the needle through the loop from the back to the front, lightly pull the floss to tighten and complete the stitch.
- Insert needle to the left and repeat
Stitch all the way around leaving an inch or two opening for the stuffing.
Stuff and continue the stitch to enclose.
Once you have all the pieces sewn and filled, attach the hearts to the cloud at various lengths.
Create a hanger for the mobile with an O-ring and satin ribbon. Loop the O-ring through the ribbon and sew the ends of the ribbon to the top of the cloud for easy hanging.
That's it! If you've got a little bit of time to watch TV in the evening, you definitely have time to make something. It does not even have to be for a nursery, perhaps a girls room, boys room, add a little whimsy to your craft room, etc.
As always, be creative and Good Luck!


its gorgeous, I love it!!
ReplyDeleteIts so cute. Do you have any other felt creations?
ReplyDelete